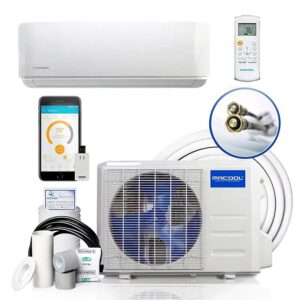
- Alexa Enabled Mini Split AC/Heating System: Integrate with voice control or app, allowing you to adjust your mini split air conditioner from anywhere. Set routines for temperature changes.
- Versatile 4-in-1 Mini Split: All-season solution with air conditioning, heat pump (functional up to 5F/-15C), dehumidifier, fan, and turbo function. Includes a DC Inverter that’s UL Listed, AHRI Certified, and works with Alexa.
- Stylish & Functional Mini Split AC: Suitable for both home and business. Provides performance without compromising aesthetics. Ideal for bedrooms, living areas, stores, eateries, and warehouses.
- Installation Package Included: Includes indoor air handler, outdoor condenser, remote control, and installation kit with a 16ft. line set and communication wire. Pre-loaded with refrigerant for up to 25 ft. Note: Professional installation required.
- 5 Year Manufacturer’s Warranty: Includes 5 years on parts replacement and 5 years on the compressor. Senville offers complimentary technical assistance. Labor not included.
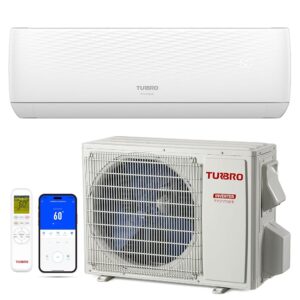
Senville LETO Series Mini Split Air Conditioner Heat Pump, 12000 BTU 110/120V, Inverter, Works with Alexa, SEER2 20.8, 1 Ton, White
$799.99
Last updated on Details
Category: Top Room Air Conditioners
| Item Weight | 78.3 pounds |
|---|---|
| Manufacturer | Senville |
| Item model number | SENL-12CD-16 |
| Is Discontinued By Manufacturer | No |
| Form Factor | Mini-Split |
| Specifications | AHRI, ETL |
| Assembly required | No |
| Warranty Description | 5 years on compressor., 2 years on parts. |
| Batteries required | No |
| Included Components | Outdoor Condenser, Indoor Air Handler |
| Capacity | 1 Tons |
| Floor Area | 700 Square Feet |
| Cable Length | 16 Feet |
| Voltage | 110 Volts |
| Noise Level | 28 dB |
8 reviews for Senville LETO Series Mini Split Air Conditioner Heat Pump, 12000 BTU 110/120V, Inverter, Works with Alexa, SEER2 20.8, 1 Ton, White
Add a review Cancel reply
Related products
Sale!
Top Room Air Conditioners
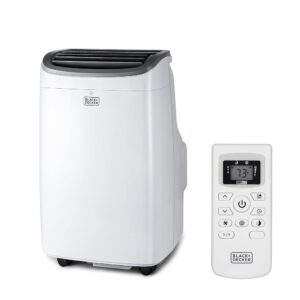
BLACK+DECKER 10,000 BTU Portable Air Conditioner up to 450 Sq.Ft. with Remote Control,White
Rated 4.00 out of 5
Sale!
Top Room Air Conditioners
Rated 5.00 out of 5
Sale!
Top Room Air Conditioners
Rated 5.00 out of 5
Top Room Air Conditioners
Mrcool DIY 12K BTU 4th Gen Energy Star Ductless Mini-Split Air Conditioner
Rated 4.29 out of 5
$1,708.00
Sale!
Top Room Air Conditioners
Rated 4.67 out of 5
Sale!
Top Room Air Conditioners
Rated 5.00 out of 5
Top Room Air Conditioners
Nu-Calgon 4287-34 (16 oz. Bottle) Nickel-Safe Ice Machine Cleaner
Rated 5.00 out of 5
$23.35


Benoit Dansereau –
This HVAC unit was received and installed about a month ago. It is a very quiet and efficient unit. It is also easy to operate. I am very satisfied with this purchase.
T. Schantz –
This is a great, high-quality product that functions well. I thoroughly recommend the Senville for quality and performance.
The install is a difficult level DIY and should only be attempted after proper research and with proper tools.
Physically installing the units is easy. Wiring the units is not difficult but is time consuming, especially accounting for running a dedicated 20A electrical circuit.
Line set installation is more involved. I chose to hang the inside unit before attaching the line set because of how I chose to run the refrigerant piping inside the room and then straight through the wall to the outside unit. I made my own wall pass-through sleeve from 3″ pvc to give a little more working space. The included sleeve is very thin and flimsy. Line set flare nuts MUST be torqued to spec. I had one nut that failed and had to remove, replace with an included extra, and reflare the connection when I found the leak during the first pressure test. I shortened the refrigerant piping at the outside unit to fit with no looping of pipes. I used an eccentric flaring tool to remake the connection after shortening.
Next step of pressure testing with nitrogen MUST NOT BE OMITTED. You will need a HVAC charging manifold, special fittings, a micron vacuum gauge, HVAC leak test soap, a compressed nitrogen tank and regulator, and a vacuum pump. A competent pro installer will do this–but many HVAC techs skip the pressure test step.
I pressure tested and found the bad flare nut leak, repaired it, and pressure tested again to 300psi nitrogen. This forces most air and water out of the lines. I left the lines on pressure, applied leak test soap and left the set up for over 1 hour. There was absolutely no leakage according to the HVAC manifold gauge.
After pressure testing, a vacuum test was performed using a micron vacuum gauge to make sure all nitrogen, air and water vapor was removed from the lines. You will need special fittings as mentioned, to insure that the lines remain isolated from the pump after evacuating. I vacuumed down to 220microns and let it sit for 30+ minutes. The gauge remained well below 300 microns. (the standard is to remain below 500 microns). This step double checks for leakage and confirms removal of all gasses and water before releasing the factory charge into the system. Next, isolate the gauge from the system using the special fittings, and release the refrigerant charge from the compressor into the system. After a final check for leaks after removing all gauges and fittings, the system was ready to power up and test run.
Note: the flare nuts are crudely shaped on the outside (seem to be cast, rather than machined) so normal open ended wrenches do not fit them well. You will have to use adjustable wrenches to adjust them when installing. Using a torque wrench on those flare nuts is difficult because of the non-standard finish and sizing. A $175 adjustable wrench head HVAC torque wrench (made by Yellow Jacket) would really assist here, but I had a standard torque wrench with crow’s foot wrench adapters. I made it work… but that’s not an easy way to do it. I doubt many techs carry the special torque wrench and will just do the flare nuts by feel based on experience.
The test run of the unit revealed no leaks, so I wrapped up the line set at the connection points and finished the install. I used a line set cover flashing to protect the lines where they emerged from the outside wall. Zip ties where needed to secure the wrapping tape. Big HVAC type zip ties screwed to the wall to mount the indoor line set in permanent fashion. double checked the drain line was working properly without restriction by pouring water in the top of the inside unit and verifying full drainage. I left the primary drain line joint uncovered inside so I could have access if there was ever a blockage.
The unit heats wonderfully, cooling is great, too, but I will have to confirm how that works on a really hot day this summer. You will have to run the cooling check on manual cool override if temperature is below 62º outside (it was cool here on the test day). The air output on cooling feels ice-cold.
Spend the time and money to install it correctly and the Senville will serve you well, I think. If you are not comfortable doing it DIY, then hire a good installer.
You will not have factory warranty without a professional installer according to Senville. I chose DIY anyway after researching the process and finding than some installers skip the pressure test. (Senville in fact does not insist on a pressure test in the install manual.)
22 months in, I could not be more pleased. Keeps my garage/workshop comfortable year round (outside temps ranging from 7° to 97°) and has very little impact on my power bill. Just keep the filters and fins clean for best efficiency. So far, I have not needed to clean the blower wheel. No problems with the condensate drain at all.
drband –
Installation (hang on wall and put pipes and wires out through hole and cover, set up on stand, etc) not difficult if handy. Got electrician to wire and Hvac guy to vacuum pump.
Working well so far. Nicely quiet.
The Urban Garden –
This is a 9000 BTU LETO Series 120 Volt , This unit was not bad to install, ( Except for drilling through part of a concrete lintel. it had to be done in this layout /Configuration, Over a door , only logical place to locate it to heat multiple rooms with a single unit..) It has only been a week so here’s what’s happened so far,, it cools and heats nicely, ~45 * F air in Cooling mode on 75 * day , blows over 122* F air in heat mode on a 20* days in central MD area, we don’t get too awfully cold here so i think it will be ok..
I only used 10′ of the 16′ line set, it was a short run. I ran 12-2 with grd and a 15 Amp circuit, easy to Evacuate/Vacum lines since i have a pump and gauges. Unit was packaged VERY nice and solid, sealed unit so essentially should be clean n not have leaks, Indoor unit had Nitrogen pressure, So that was great to know it held some pressure since manufactured and was clean with Inert NI gas, Outdoor unit was Pressurized /Precharged. after doing new Flares with, Thorstone 7 Dies Flaring Tool Set Eccentric Cone Type Flaring Set, Then pulled a full Vac on it let sit for an hour, No change, no leaks, Leak tested with Nitrogen, Good to Go,, let 50 PSI of charge ( RE: 1/4 turn X 5 Sec.) into system for 1 HR tested for leaks with Simple Green , It foams up great for leak detecting, (its What I ‘ve used for Leak Testing for yrs) no change in pressure on Gauge set No leaks detected. Let the Charge go and retested for leaks Again To be confident it is ok, Had my buddy who is Certified/ Licensed HVAC tech do the parts required for Warranty, after all, I do want the Warranty just in case!! It has so many options /Modes, It Heats/Cools /Dries/FAN / AUTO , ECO/ Fan speed manual fan speed operation AUTO mode We really like this system Its SOOO QUIET, more to follow if issues pop up and if it just keeps working properly. It is used in a small apartment, Under A raised rancher style house ! 350-400 Sq/ft. Concrete slab under carpet, Cinder block walls built in, 1970, It just stays cool, Colder than rest of house unless I’m burning the wood stove and blowing hot air in, Which is getting old!!! So bring on the mini-split alternative form of efficient 20+ SEER AC, and heating EER 12.5 at 120V.. I do recommend this unit . We like it so far It fired right up, No issues thank good ness,, That’s a good sign!!
The Urban Garden –
Works great 👍, Very Quiet inside air handler and outside heat pump. I wish it had better protection for the condenser in the outside heat pump. My Mitsubishi has better protection screens on the side while this sesville is left open and unprotected, (possibly for efficiency) it will last and be durable as long as you keep the elements out of it , rain / snow / tree debris out of it . My friend who installed it has worked in the field for 32 years HVAC, just took a a couple hours. I was even able to use an electrical extension cord to get it up and running until the electrician and I get together to run the permanent electrical feed up to code.
The cooling works so well for the room 12X14 it easily cools it to 62 within ten min when I connected it and it was 80 in the room. For the price I paid for it my installer friend was very impressed with the quality for the price. Had I known it was this cheap and easy to install I would have done it ten years ago … just had a baby and baby now is comfortable for his daytime naps. A Big Thanks to Amazon and Senville for everything.
drband –
Hi,
I am a advance DIY and just finished the install. Did everything by the book.
Unit starts (the fan of the indoor unit) but after a few minutes, shows error E1. I’ve recheck everything.
Not sure how Senville (or Amazon will handle this)?
Edit,
Unit is now working perfectly. It was not an easy problem to troubleshoot. It ended-up being the terminal block in the indoor unit having a defective contact when tightening the screw. A new terminal block will be sent next week.
If you have issues, call support, they are there to help you. They even proposed to compensate me for the trouble I had with the system!
I now added the unit in Alexa and can control the unit. Very happy with my purchase.
Amazon Customer –
UPDATED: Running STILL on my solar after years and many bumpy miles!! …. Well, it’s been running all summer on my solar/battery/invertor setup.. like I mean I just left it turned on AC all summer in the driveway/campsite/ whatever and I’ve had no problems at all. I put this on the back bumper of my Motorhome, and the head unit inside just right of my entry door. In normal mode, this will draw max 460w. And it’s WAY WAY better than any 5000btu window air conditioner. Totally silent running, no vibrations, nothing. Mostly it uses under 250w when running after the room gets cooled off and it’s just doing maintenance on the cool. Seriously, I can’t imagine why every RV doesn’t come with these. It’s so far superior to every other AC. BUT.. the install is a bunch of work, Be prepared for some insulation, tubes, wiring, holes, filling, bolting, brackets, etc etc. The install isn’t for the first timer or the faint of heart, but once it’s all in, it’s truly worth every minute of effort.
And the heating function works amazing too! Super nice warm air from the unit inside, and the only draw back to the heating cycle is the outside compressor works at higher speed and watt usage goes up to over 650w when heating. (as well as TURBO AC mode). There doesn’t seem to be a light duty heating mode, like there is with the AC modes.
Love this thing. Never going back.
MCH –
I bought this unit to cool 1000 sq/f in a mild climate. It took 2 days to install as i did not have easy access to power. This unit requires a 2 pole 1 phase 240V circuit. basically what that means is you need 3 wires connecting to your breaker panel. 2 positives and a ground (neutral is not used). Anyways the unit was missing some much needed metal clamping grommets for the inside unit and outside unit. These are not included and they expect that your experienced electrician will provide them. If you are doing this yourself you can get them from the hardware store. Installation was very easy, use a stud finder and RTFM.
For the copper hookups I had a professional AC installer come in and do the work as the equipment to vacuum the lines cost the same amount as their service and since i will only do this once i do not need to have the equipment hanging around the house. The unit vacuumed nicely and the techs were impressed on how low they could get the vacuum.
Once all hooked up i powered the unit on and cold air came flying out. The unit is super quiet and you can only hear it on turbo mode (Full speed). the outdoor unit is also ultra quiet and your neighbours will not even notice it running.
This unit is fantastic, don’t let the unknown name throw you off from buying this, it is high quality and the radiators have tons of surface area to allow the heat transfer to happen. they are anodized blue in color and look awesome. i would love it it they made a clear cover as i think the inside looks amazing.