
In this step-by-step guide, “How to Troubleshoot Common Humidifier Issues for Allergy Sufferers,” we will explore practical solutions to address frequent problems that may arise with humidifiers. While these devices play a crucial role in alleviating allergy symptoms by adding moisture to the air, they can occasionally malfunction, leading to frustration for users. By following our simple troubleshooting techniques, you can ensure your humidifier operates effectively, providing the relief you need from dry air discomfort. Whether it’s addressing low humidity levels, unusual noises, or maintenance concerns, this guide will equip you with the knowledge to keep your humidifier in peak condition.


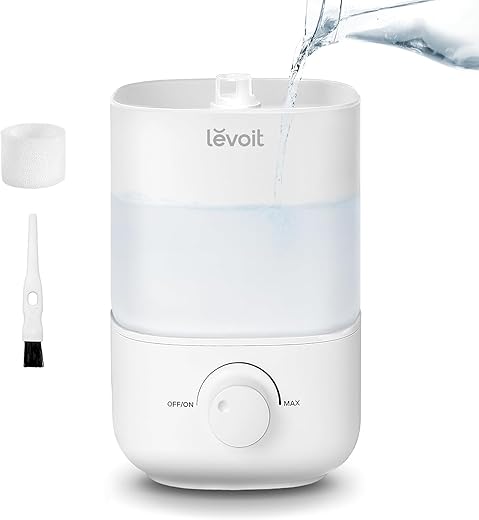
Inspect the water level in your humidifier’s tank. Look for the water level indicator, usually marked with minimum and maximum lines. If the water level is below the minimum line, fill the tank with distilled water until it reaches the recommended level. Ensure that you use distilled water to prevent mineral buildup and keep your humidifier running efficiently.
Secure the lid tightly after filling the tank. Check the lid’s alignment to make sure it’s properly sealed to avoid any leaks. Place the tank back onto the base of the humidifier and make sure it sits firmly. This will ensure that your humidifier operates effectively and maintains the desired humidity levels in your space.


Inspect for Mineral Buildup
Examine the humidifier regularly for mineral buildup or scale, especially if you use hard water. Look closely at the water tank, filter, and any other components where mineral deposits may accumulate. Pay attention to areas where water evaporates or flows to identify any signs of restriction.
Clean the tank and components according to the manufacturer’s instructions. Mix a solution of equal parts vinegar and water to effectively dissolve mineral deposits. Soak the affected parts in this solution for about 30 minutes, then scrub gently with a soft brush or cloth. Rinse thoroughly with clean water to remove any lingering vinegar residue before reassembling the humidifier.
Check the Filter
Check your humidifier’s filter for clogs or dirt buildup. Open the humidifier according to the manufacturer’s instructions and locate the filter. Inspect it closely for any visible dirt, dust, or debris. If the filter appears dirty, gently clean it using a soft brush or rinse it under lukewarm water. Allow it to dry completely before reinserting it into the unit.
Replace the filter if it is beyond cleaning or shows significant wear, such as fraying or discoloration. Purchase a compatible replacement filter and follow the installation instructions provided by the manufacturer. Regularly checking and maintaining your filter will ensure optimal airflow and humidity output from your humidifier.
Examine the Power Source
Plug in the humidifier and make sure it’s connected to a working outlet. Test the outlet by plugging in another device, like a lamp or phone charger, to confirm it provides power. If the second device doesn’t work, you might need to check your home’s circuit breaker. Look for any tripped breakers or blown fuses. Reset any breakers if necessary, and replace any blown fuses to restore power.
Inspect the power cord for any signs of wear or damage, such as fraying or exposed wires. If you notice any issues, stop using the humidifier immediately and consider replacing the power cord or the entire unit. Always prioritize safety when dealing with electrical components.
Test the Humidity Setting
Review the humidity settings on your humidifier. Check the display or manual settings to see what level it is currently set to. If it’s lower than 30%, increase it, as a setting that low may not provide sufficient moisture in the air. Aim for a comfortable range between 30% and 50% relative humidity. Adjust the dial or digital setting accordingly.
Monitor the performance after making adjustments. Keep an eye on how the air feels in your space. If it still feels dry or you notice static electricity or dry skin, consider raising the humidity level slightly. Use a hygrometer to measure the relative humidity in your room, ensuring it stays within that ideal range. Regularly check and adjust as needed to maintain a comfortable atmosphere.
Monitor for Strange Noises or Leaks
Listen carefully for any unusual sounds, such as rattling, hissing, or banging coming from your unit. These noises can indicate mechanical issues that require immediate attention. If you hear anything out of the ordinary, take note of the sound and its frequency. Consult your user manual for troubleshooting specific noises; it may provide insights into what the sound could mean and guide you on the next steps to take.
Check for water leaks around the unit by inspecting the area regularly. Look for any puddles or damp spots that may indicate a leak. Pay attention to the hoses and connections, ensuring they’re secure and free from damage. If you notice any leaks, turn off the unit and refer to your user manual for guidance on how to address the issue. Taking these proactive steps will help you maintain your unit and avoid more significant problems down the line.
Final Tips for Relief
In conclusion, by implementing the troubleshooting steps outlined in this blog post, you can keep your humidifier in top condition and maximize its benefits for allergy relief. Remember, regular maintenance and attentive monitoring are key to ensuring your humidifier operates effectively, ultimately improving your indoor air quality and helping you breathe easier. With these tips in hand, you can create a more comfortable environment that supports your well-being and minimizes allergy symptoms. Happy humidifying!
Essential Supplies Needed


Effective Solutions Explained
Maximizing Allergy Relief: Practical Tips for Using Humidifiers Effectively
- Choose the Right Humidifier: Look for a humidifier that suits your space. Evaporative and ultrasonic humidifiers are popular choices that can help maintain optimal humidity levels without over-humidifying
- Maintain Proper Humidity Levels: Aim for indoor humidity between 30% and 50%. You can use a hygrometer to monitor the humidity in your home, ensuring it’s comfortable and effective for allergy relief
- Keep it Clean: Regularly clean your humidifier according to the manufacturer’s instructions. This prevents mold and bacteria buildup, which can exacerbate allergies instead of helping
- Use Distilled Water: Fill your humidifier with distilled or demineralized water to reduce the release of minerals into the air, which can lead to respiratory issues and worsen allergies
- Position Wisely: Place the humidifier in a central location, ideally in your bedroom or living area, but away from walls and furniture to allow for proper airflow. This ensures even distribution of moisture throughout the room
- By following these tips, you’ll be on your way to creating a more comfortable environment that can help alleviate your allergy symptoms!
How Humidifiers Alleviate Allergy Symptoms
Yes, maintaining the right humidity level in your home can significantly help reduce allergy symptoms. Ideally, you should aim for indoor humidity levels between 30% and 50%. This range helps to inhibit the growth of mold and dust mites, both of which can trigger allergic reactions.
To monitor and control humidity, you can use a hygrometer, and if levels are too high, consider using a dehumidifier. On the other hand, if the air is too dry, a humidifier can help maintain a comfortable level. Keeping your home within this ideal humidity range can create a more comfortable living environment and potentially lessen allergy symptoms.
This guide is a lifesaver! I recently moved to a place with super dry air, and my allergies were all over the place. After following these steps, I finally got my Vornado Evap40 working perfectly. Now my living room feels like a spa and I can actually breathe again! 🌬️
So glad to hear the guide helped you out! The Vornado Evap40 is a solid choice for adding moisture to the air. Enjoy your spa-like living room and happy breathing!
Just a tip from my experience—using distilled water in my Honeywell Cool Mist Humidifier has made such a difference! No more mineral buildup and my allergies are way better. Plus, I clean it weekly to keep it fresh. Anyone else do this?
Great tip! Using distilled water can really help reduce mineral buildup, and cleaning your humidifier weekly is a smart move. Thanks for sharing your experience with the Honeywell model!
Thanks for the suggestion! We’ll definitely consider adding a section about choosing the right humidifier and regular maintenance tips. Keeping your humidifier in top shape is key for allergy relief!
Hey, great guide! I think it’d be super helpful to add some info on how to choose the right humidifier for allergy sufferers. Like, some models are better than others, you know? Also, maybe touch on how to maintain them regularly to avoid issues. Thanks!